
HISTORY OF MJE ART
My personal journey with art started early during my childhood. In this time my parents saw my potential and would encourage my creative streak though bringing home different mediums for me to experiment with including my first batch of Nylon clay . I found it very difficult to leave my art at home, always doodling (even when I wasn't supposed to!) and showing other children my latest work during lessons and break time. I always knew that this is what I was meant to do, and later on I went on to receive qualifications in art and design during formal education.
In 2009 I decided to share my artwork with the world, establishing a brand name through social media platforms including DeviantArt and Facebook. I have received a great deal of encouragement from my peers and have since generated a broader following. I would occasionally run competitions and take part in both local and charitable events. If you wish to find out what projects I am working on currently then please feel free to join me using the social media links below.
BEHIND THE SCENES
The Process of Making an Animal Sculpture
The most common question I receive from people is "how do you make your sculptures?" so I thought it would be best to provide a rough step-by-step guide as to how I produce one of my animal sculptures.
After a trip to Norway I became inspired to create a Moose animal sculpture. I have only ever made one other Moose before, but felt an updated piece would be an appropriate if not slightly challenging choice to show people my techniques. For more detail on how I brought my Moose to life please visit my Facebook page or contact me with any questions.
Disclaimer - My techniques will likely vary to that of other artists, but of course that is the pure beauty of art itself. The following piece was produced largely for demonstrational purposes. The finished product shown here only exhibits some of the techniques that I use, please refer to my gallery to see more of my other styles.
Please click each gallery below for enlarged photos of the process.
Gallery - Part 1
Top Tips



Experiment with a variety of tools, e.g. wire end, high grade hardwood, carbon & ribbon steel, kidney-shaped, sponges, hole cutters &
double-ended carving tools.
Correctly "wedging" your clay prevents your piece changing shape during firing, which can cause cracking. Search YouTube for more tips.
* Alternatively, you can "pull out" features from one lump of clay. This technique can be more useful with certain shapes or when the subject is not standing.


Hollowing out to the extent that I do provides an opportunity to check the thickness of the clay, again it's better to avoid damages during firing.
If you are unsure about certain areas, you can use a length of flexible wire to ensure hollowing is complete. I will also check by blowing air through different cavities.
Drying can depend on the season, ambient room temperature and thickness of the clay.

Remember, all sculptures must have hole because during firing the air inside expands and needs to escape.

If you make an error with your glazing, don't panic, you can use a damp sponge or brush to reduce it.

It is important to ensure that your kiln is well-balanced to ensure the safety of your work

Leaving space between your work during firing is vital. But having a full load is both energy and cost-efficient

Before I begin I prepare my work area by cleaning and clearing space, which helps keep an environment that is safe to work on the sculpture.
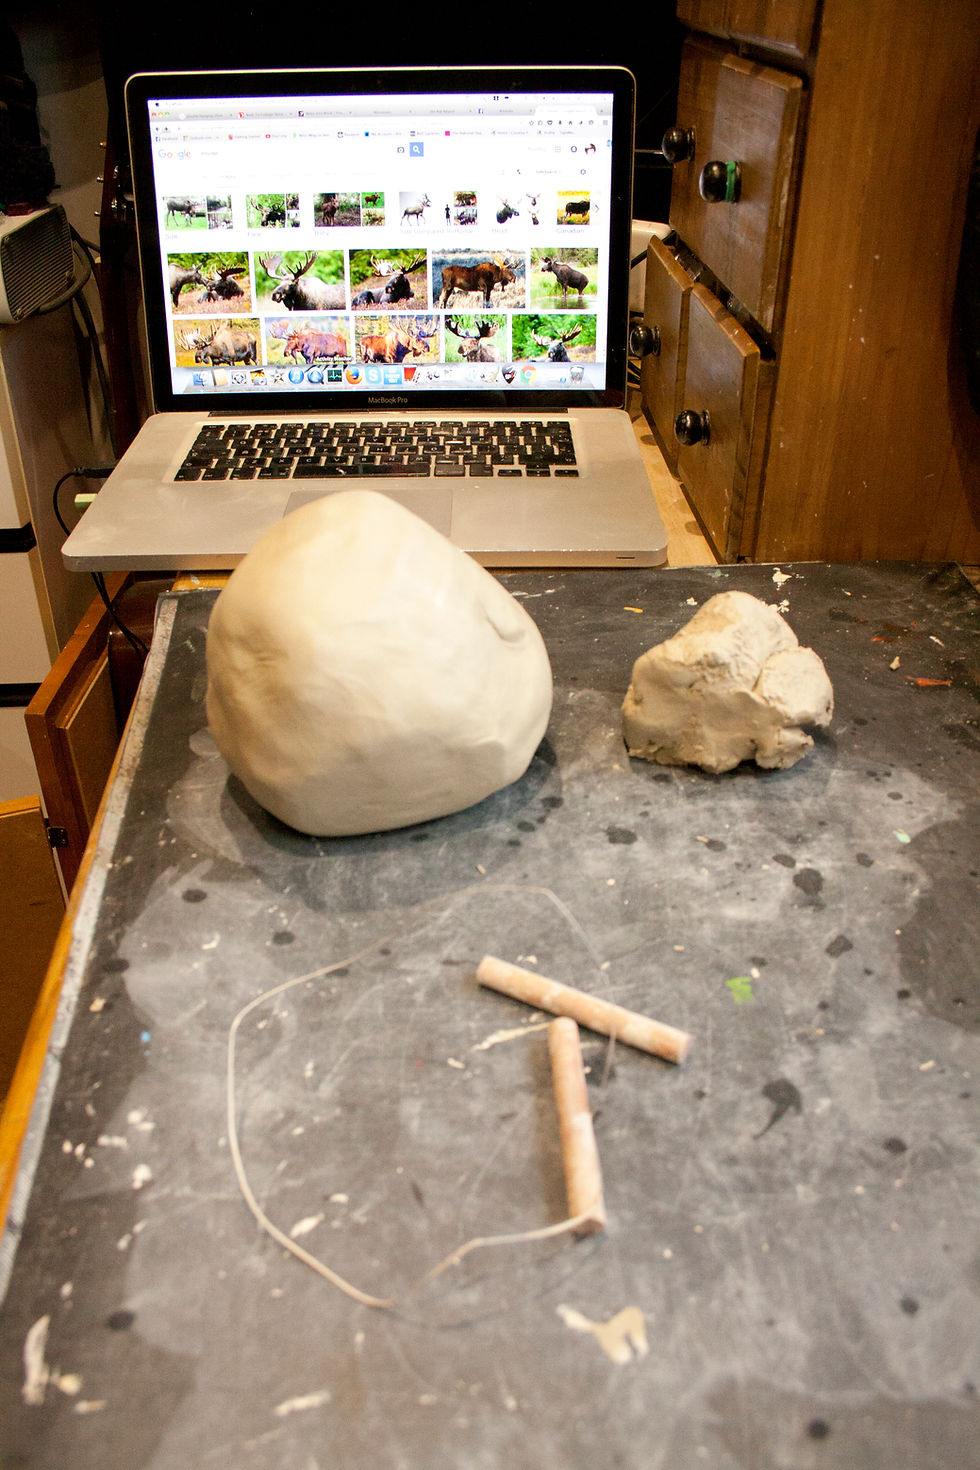
An amount of clay is cut with a cheesewire, hit and compressed repeatedly in a process called "wedging" to rid the raw clay (right) of air.

Using various reference images I work the clay into the rough proportions needed. In this case I'm using a hollow vessel for my sculpture.

With a rough torso prepared you can roll out separate pieces of clay for limbs and other additional features, in this case a head and antlers. *

During these early stages, the clay is more malleable so it is important to ensure you support your work until it can hold its own weight. Be creative here.

When attaching clay-to-clay, I use a criss-cross motion using a tool to score the clay on both edges and add slip to minimise trapped air.

With finer detail I start with the face. I normally begin using my thumbs to form eye sockets, creating symmetry, before building up and defining muscle tone.

As my piece begins to take shape my focus turns to the proportions of the subject, using multiple references. The sculpture begins to hold its own footing.

Ridding your sculpture of air minimises risk of cracks during firing. One way to hollow is to slice through, scoop out clay and reattach.
Gallery - Part 2

Another method to remove clay is by simply cutting a square or keyhole piece and carefully using a tool to remove clay. Note wet clothes to keep piece damp.
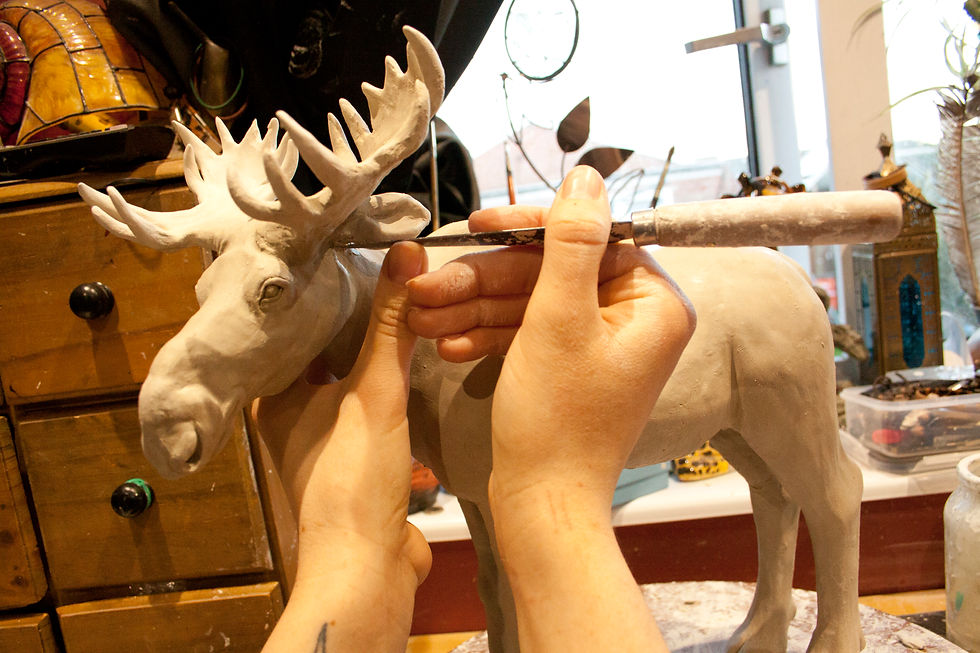
Ornate pieces can be tricky; patience, using supports, and timing of when to join the clay, is key.

Larger pieces take longer to dry and become "Leather hard." At this point the clay becomes more fragile and has less flexibility.
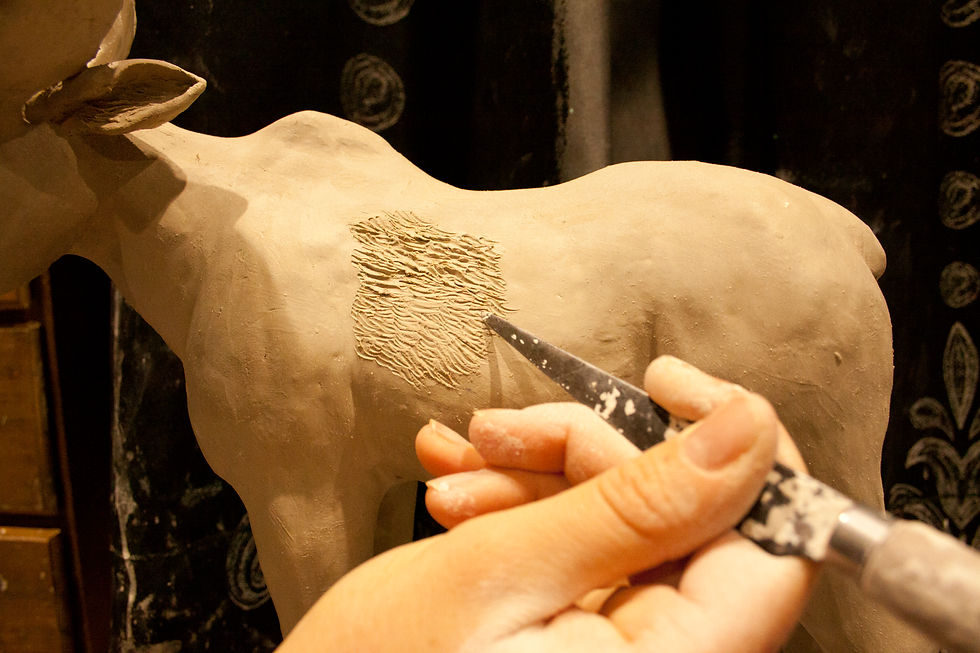
Using different tools I create fur . Alternatively, I can add tiny pieces of clay on a knife-edge to bring out the illusion of a thicker coat.
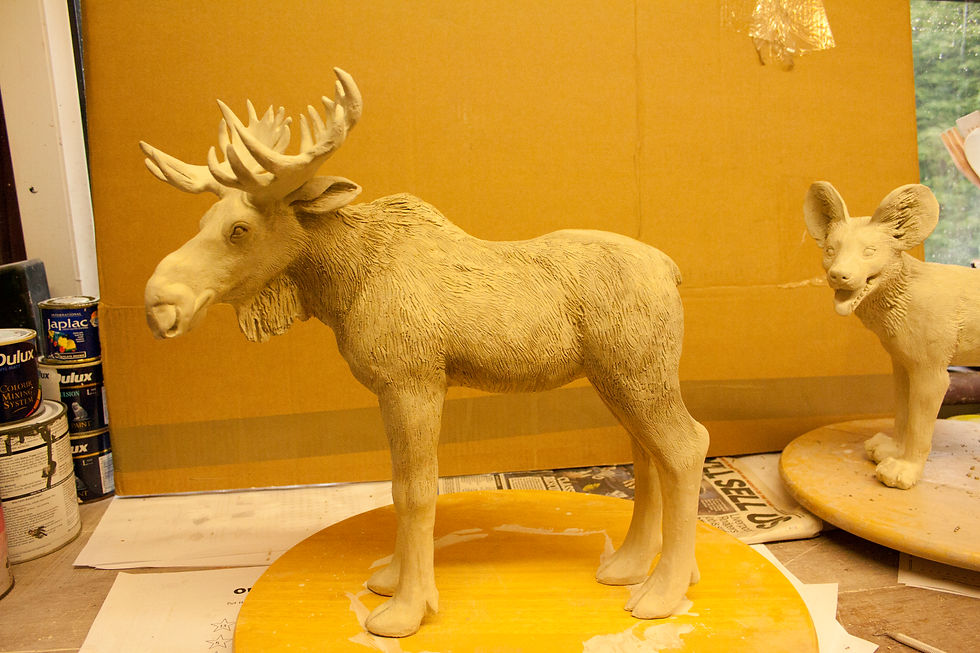
Once happy with your sculpture you must move it somewhere safe to dry out fully before firing in a kiln. This can take a couple of weeks!


To finish of my sculptures I stamp my own personal potters mark.
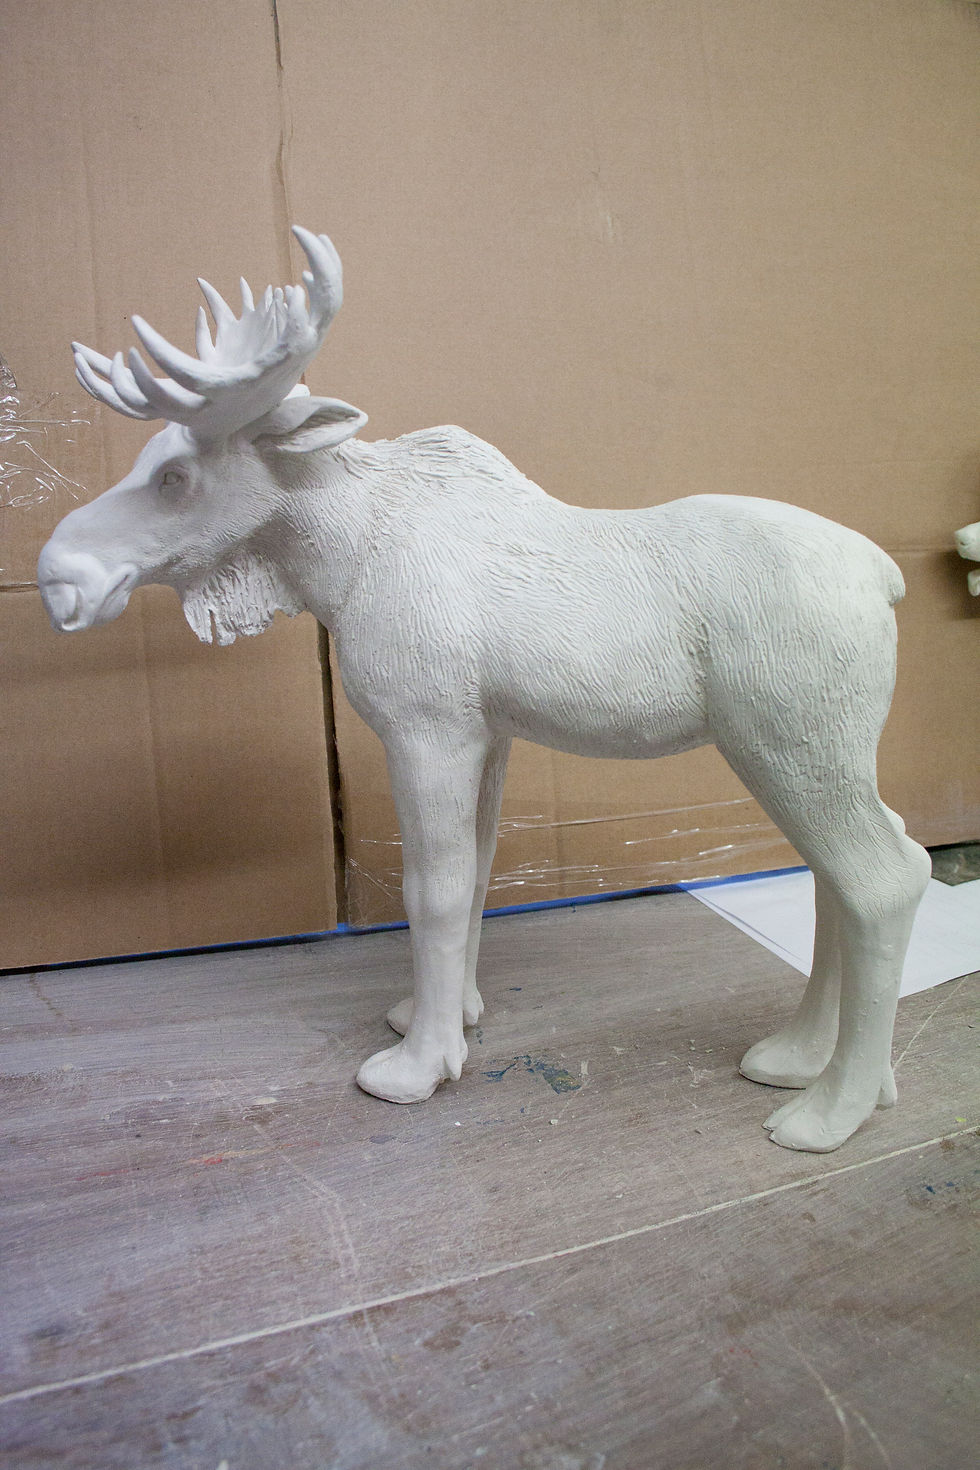
After a day in the kiln, the clay has now changed to a bisque state. Even though it is more brittle, it will also better absorb glaze.
Gallery - Part 3

Once I have opened my kiln my sculptures are ready for the glaze to be applied.

Here you can see sample tiles showing the affect of firing on different glazes with different types of clay.

I start with a black wash, normally on the face, which bleeds naturally into crevices picking up the finer detail.

Detailed shot of the use of a water-underglaze mixture to reach hard to get places.

A wash provides a base coat enhancing the detail below layers applied later.

At this point I have used the underglaze to highlight muscle tone and shaded areas on the body.
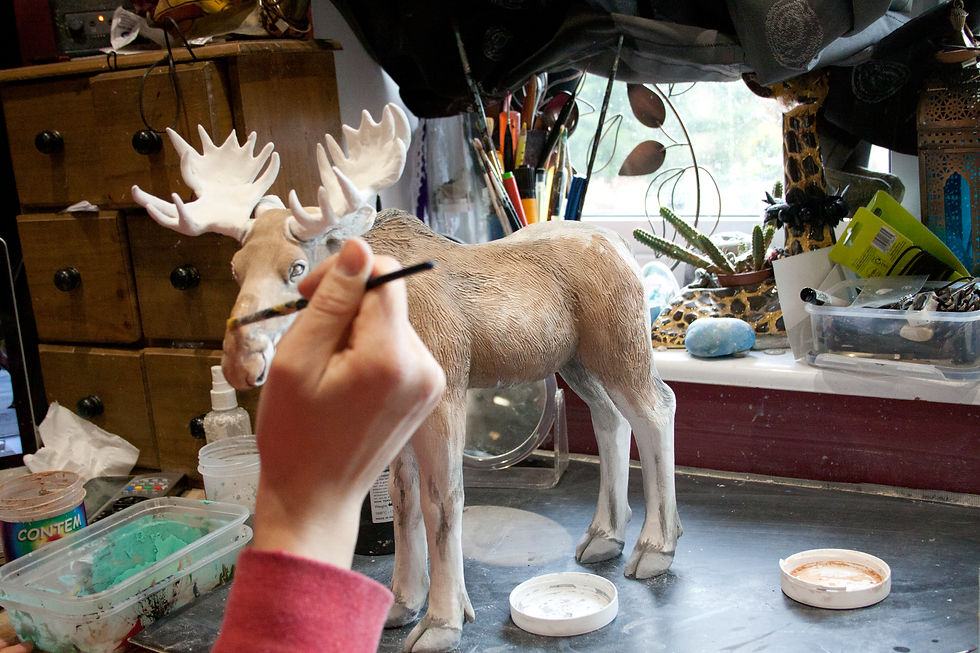
Using photos as reference, I mix brown and black underglaze to create a mottled effect.
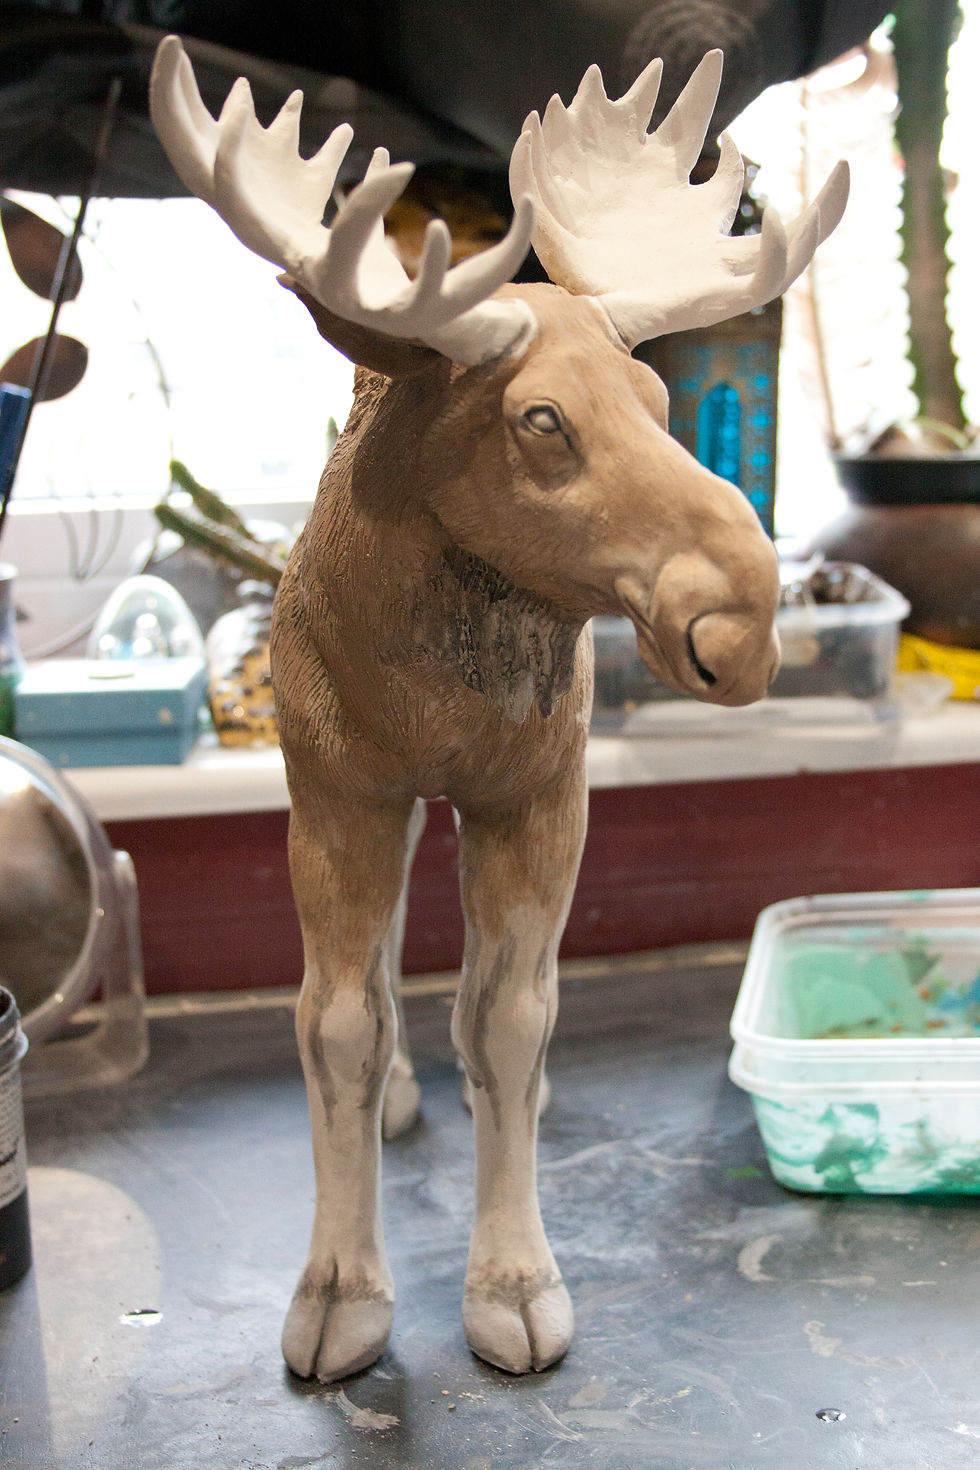
I continue until I am happy with individual features and I assess whether I need to add any more layers.
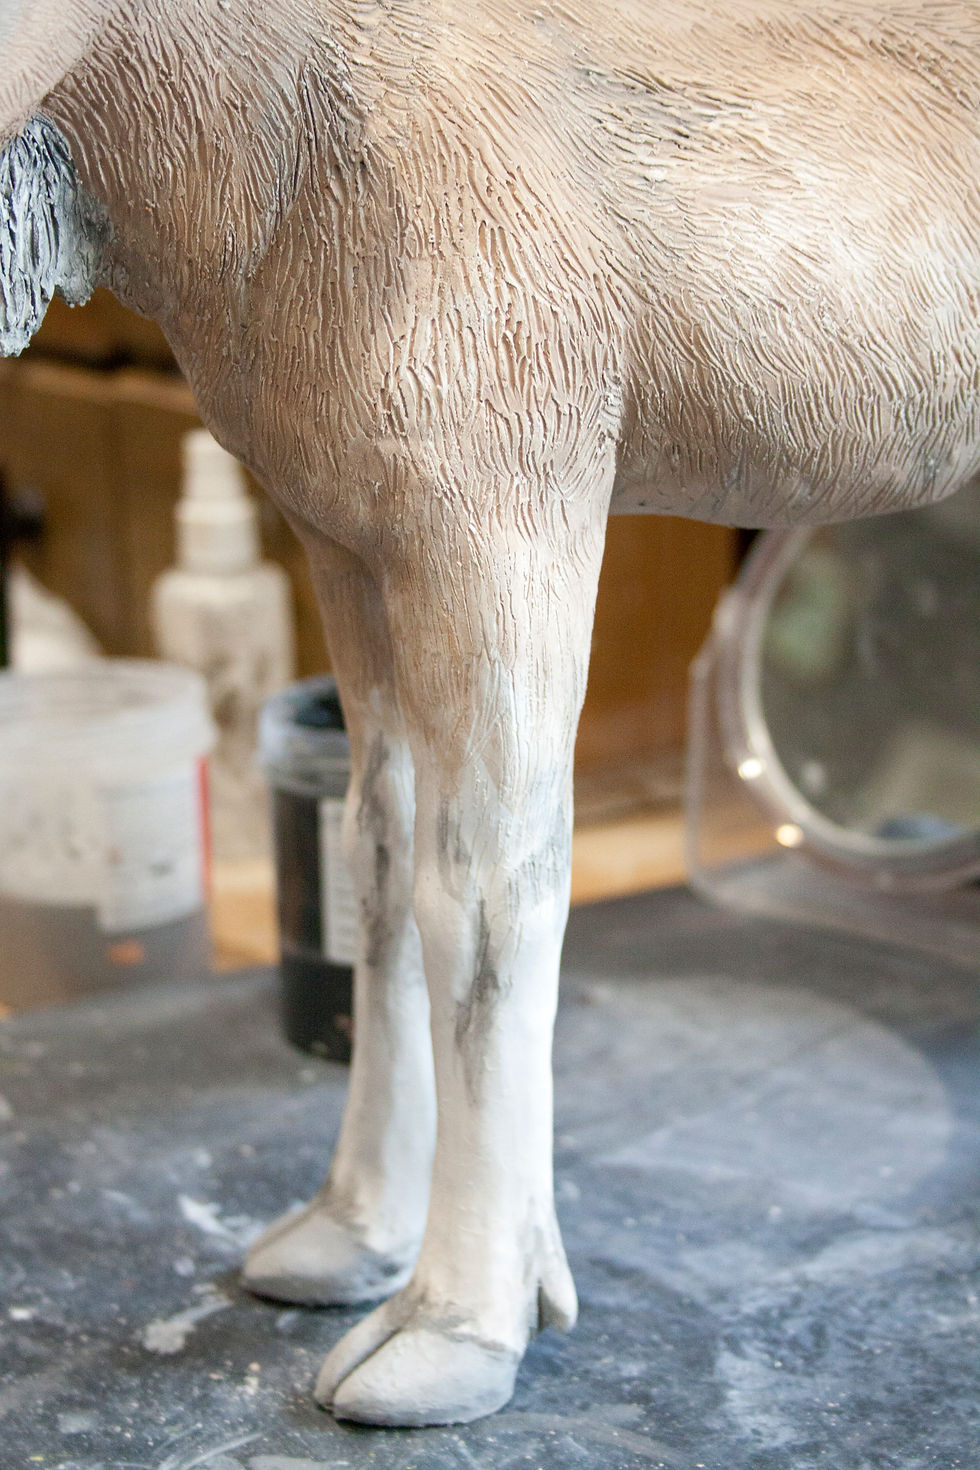
Another technique is to leave the natural colour of the clay, which I decided would work for the lower legs.
Gallery - Part 4


Side shot. You might notice that the underglaze coating appears dusty, but this finish changes dramatically as it is absorbed into the piece while firing.

Facing Right, ready for second firing.

The finished product. The moose has been transformed and brought to life.

I am incredibly pleased with the way in which the colour has came out after firing.

Using a shiny black glaze for the eyes has added depth and soul to my work.
Fun Facts


Occasionally I use random things I find lying around as tools if it fits the job, such as a porcupine spine, a gift from South Africa.
Be creative
I generally use crank clay, as it is more robust, but have also dabbled with scarva (white) and college buff (grey) - both of which are more vibrant when glazed.
Personally, I produce better quality art with music playing and when I am more relaxed.
Your work environment is very important!


My favourite tool is a Fettling Knife, which I use at different stages in the production of my ceramic work. It was also the only tool I used for many years.
In addition to photos, I watch wildlife documentaries to observe the animals in motion, to gain a better understanding of muscle movement and expression of character.
While not working on a sculpture I keep it wet by brushing on or spraying it with water. I use plastic bags or newspaper to maintain moisture.

The first firing (bisque) reaches 999°C under incremental steps. The size of a sculptue dictates how slowly you perform your first firing.

The eyes truly bring my work to life - either I indent the clay to create the impression of a iris and pupil or use a shiny glaze.

Sometimes when glazing I turn my sculpture upside-down in my lap to paint the underbelly and minimise on touching parts that have already been painted.

When I can see the individual sculptures character I often name my piece.
In this case I would like to introduce you to - Norman!
FINAL TOUCHES
The process used with each and every sculpture can be very different.
In this instance I am very happy with my moose, so I do not wish to make any further alterations. In addition to the steps above I sometimes use transparent glaze in order to achieve a glossy finish with my sculptures. I have also used a transparent aerosol lacker and acrylic paints to enhance my work.
With the final product in hand I am happy to share my work with others. Ocassionally I will also mount my work on wooden plynths, and or cover the base with felt for indoor use.


ABOUT MY KILN
I acquired my own P5942 electric front-loading kiln from Potterycrafts (See www.potterycrafts.co.uk or contact kilns@potterycrafts.co.uk for more information). The P5942 or "Heatloader" is a 128 litre 7.5kW (40A) kiln with a maximum firing temperature of 1300°C controlled using a Stafford Instruments ST315A temperature programmer controller. According to Potterycrafts "The kilns are constructed of a durable low thermal mass insulation brick with a high grade backup insulation board which is enclosed within a robust high quality pressed steel powder coated frame. Heavy duty Kanthal A1 spiral wound elements are used to heat the kiln, the elements are tube mounted for optimum efficiency on both side walls and floor of the kiln to allow uniform heat distribution throughout the chamber and additionally the elements are graded from top to bottom further aiding even temperature distribution within the kiln." The chamber is the most important feature with dimensions of 40 x 44 x 69.3 cm that I load pieces into using ceramic stilts and shelves before bringing my sculptures to life.
If you are interested in renting out my kiln please get in touch.
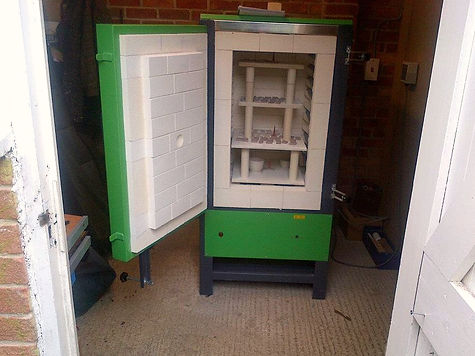

Left - My P5942 electric front-loading kiln Right - An example of a loaded kiln before first firing (Bisque)


